A few months ago, I noticed that our neighbors were having a tree removed from their front yard. It was a really beautiful old white oak tree, but unfortunately blocked out so much light that it put the entire front of their house in the shade and meant that they couldn’t grow a thing.
Before the removal team took the remains of the felled tree away, I was lucky enough to nab some of the gorgeous pieces that they had sliced up (they were actually happy for us to take a few off their hands!).
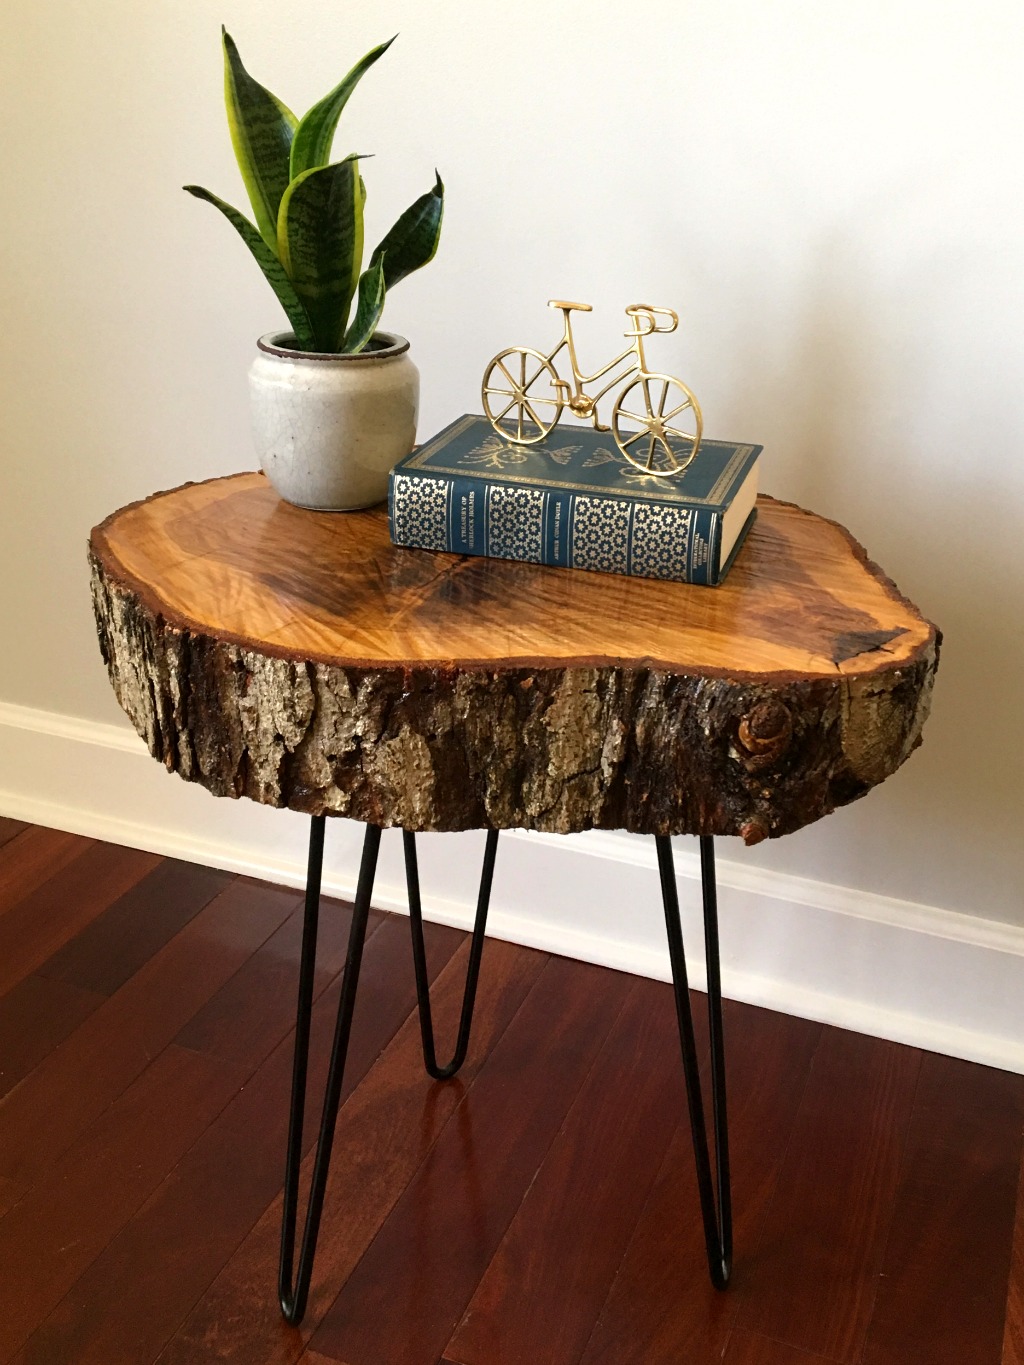
So… the plan has been to make my own version of the natural wood accent tables you often see in the stores these days… but without the high price tag!
This is such a easy way to add a completely custom side table or coffee table to your home.
You can find many online tutorials for creating similar pieces, and there are lots of different approaches, but this is how I went about it. Given that I’m a self-confessed novice in this area, I opted for simplicity 🙂
Here’s what you’ll need:
- Tree slice
- Electric sander
- Wood finish
- Metal hairpin legs
- Spray paint (optional)
- Wood screws
- Drill
A note on where to source tree slices: as I mentioned, we were lucky to stumble upon ours by chance. I did a little research though and you can easily pick up similar slabs at local lumbar yards, craft stores, or online (like the ones you can get from Save-On-Crafts here).

Step 1: prepare the wood slice
Prep the tree slice by giving it a sand to smooth out the surface and remove some of the imperfections. Depending on where you sourced your tree slice, you may be able to skip this step, but in our case since it came straight from the tree, a little TLC was definitely needed first.
We used course sandpaper (grit 60) and an electric sander to do the job. It’s still not perfectly smooth – I think you’d need a wood planer for that – but it’s certainly good enough.
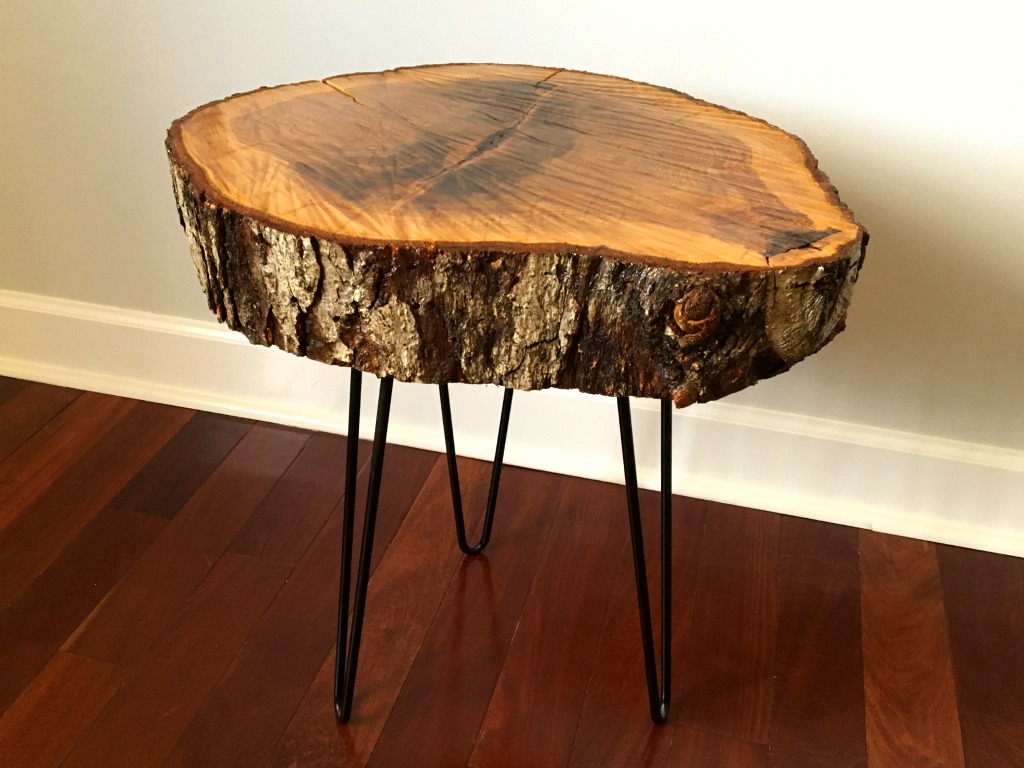
I decided not to remove the bark, which I think gives a more rustic look. It also seemed to help prevent too much cracking while it was sitting in our garage drying out for months until I finally got around to this project!
Our tree slice is approximately 5 inches thick (exactly as the arborists cut it) but I think that it would work equally well with a thinner piece.
Step 2: apply a wood finish
After the surface is smoothed out, seal the wood with a finish (I used polyurethane, in a semi-gloss finish) to protect the wood from spillages, heat damage etc.
I applied the sealant with a foam brush and it took five or six coats to get a thick, even covering. Once it dried, we ended up with a nice, smooth finish.
Step 3: paint or seal the table legs
We chose hairpin legs for our table, which seems to be a style that’s very popular right now. Depending on the look you’re going for, you can leave the metal table legs as they are, or paint them the color of your choice.
The table legs we used – available here – are made of raw, uncoated steel. In order to minimize the chance of rusting over time, I decided to give them a coat of spray paint. As an alternative, you could simply apply a coat of linseed oil or beeswax.
By the way, I can highly recommend the Etsy vendor we used… the metal legs are great quality at a great price (about $8 each) and shipping was super quick. You can also specify the exact size you want.
Next time I might be a little more adventurous with the color, but since this is really my first attempt at creating any kind of furniture from scratch, I thought I’d play it safe 🙂
Step 4: attach the table legs
Finally, lay the slice on a flat surface and position the legs, making sure that they’re evenly spaced. This can be a little tricky, given the irregular shape of the tree slice… I just eye-balled it.

Once you’re happy with the placement, attach the legs using some wood screws (the longest that your tabletop thickness will allow). You’ll probably want to use a drill to make the holes for the screws.
And that’s all there is to it. Now we have our very own DIY tree slice table. I was quite pleased with how this little project turned out. It ended up costing about $35 all in… not too shabby!
Let me know what you think… have you tried anything similar? How did it work out for you?